Step 1 - Create the stencil
In this step of the tutorial you create the stencil and prepare the stencil and content for separate rendering. In the next step you use render passes to show of 3D content only an area defined by the shape of the stencil.
Assets for the tutorial
The starting point of this tutorial is the Stencil.kzproj Kanzi Studio project file stored in the <KanziWorkspace>/Tutorials/Stencil/Start/Tool_project directory.
The <KanziWorkspace>/Tutorials/Stencil/Completed/Tool_project directory contains the completed Kanzi Studio project of this tutorial.
The starting point project contains the content you need to complete this tutorial:
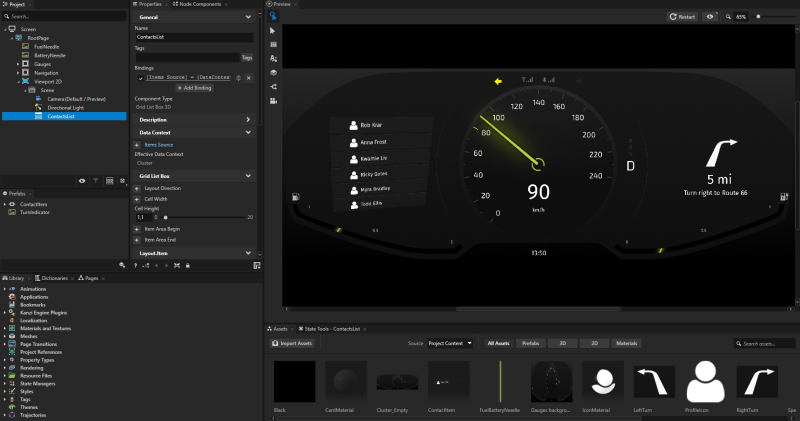
- The project contains a cluster with contacts list on the left side of the speed gauge. In this tutorial you apply the stencil to this contacts list.
The RootPage > Viewport 2D > ContactsList node contains the list of contacts. The project uses the XML_data_source plugin to get the data for the ContactsList node.
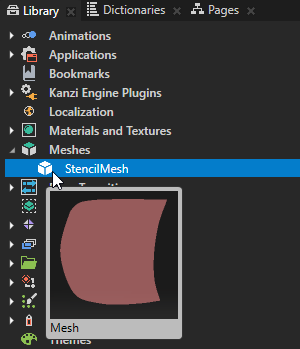
- The Library > Meshes > StencilMesh contains the shape you use to define the area of the ContactsList node that you want to show.
Create the stencil
In this section you use a Model node to create a stencil which determines the area of the ContactsList node that you want to show.
To create the stencil:
- In Kanzi Studio open the Stencil.kzproj project stored in the <KanziWorkspace>/Tutorials/Stencil/Start/Tool_project directory.
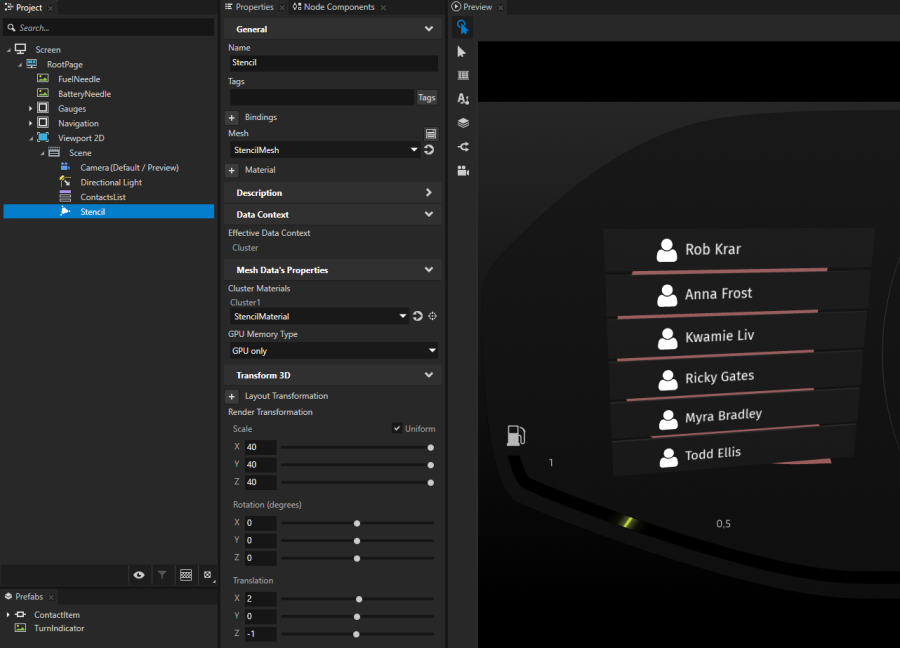
- In the Project press Alt and right-click the RootPage > Viewport 2D > Scene node, select Model, name it Stencil, and in the Properties set the Mesh property to StencilMesh.
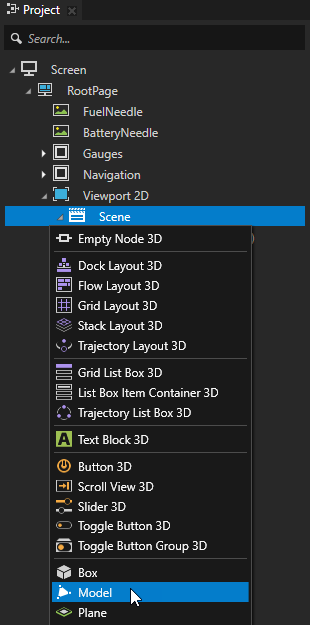
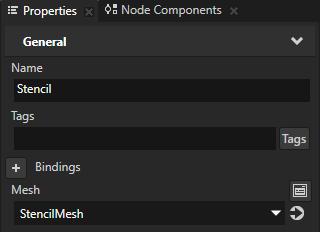
- In the Project select the Stencil node, in the Properties add the Render Transformation property, and set:
- Scale property fields to 40
- Translation X property field to 2
- Translation Z property field to -1
You set the size and position of the Stencil node in relation to the content in the cluster.
In the Preview you can partially see the shape of the red StencilMesh through the gaps between the items in the contacts list.
Prepare the stencil and content for separate rendering
In this section you use Tag Filter resources to separately pick the Stencil node and the ContactsList node. In the next step of the tutorial you use these filters in the render passes to separate the rendering of the Stencil and ContactsList nodes.
To prepare the stencil and content for separate rendering:
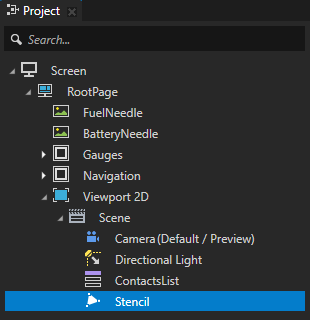
- In the Project select the RootPage > Viewport 2D > Scene > Stencil node and in the Properties set the Tags property to Stencil.
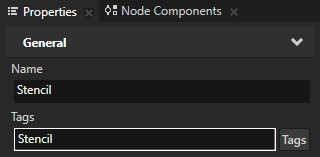
TIPUse tags to group, find, and filter nodes in your project. You can assign multiple tags to a single node.
- Create a Tag Filter which picks the Stencil node:
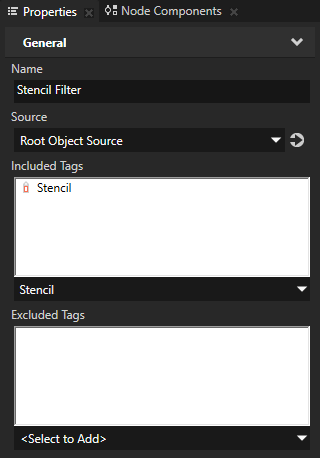
- In the Library > Rendering press Alt and right-click Object Sources, select Tag Filter, and name it Stencil Filter.
Tag Filter collects 3D nodes that have a specific tag assigned.

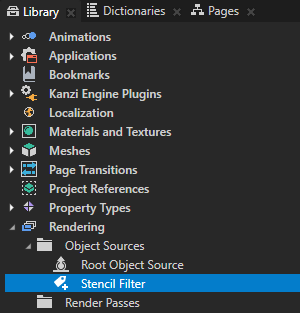
- In the Properties set the Included Tags property to the Stencil tag.
This way you set the filter to pick the nodes that have the Stencil tag.
You use this filter in the next step of this tutorial to pick the Stencil node for rendering.

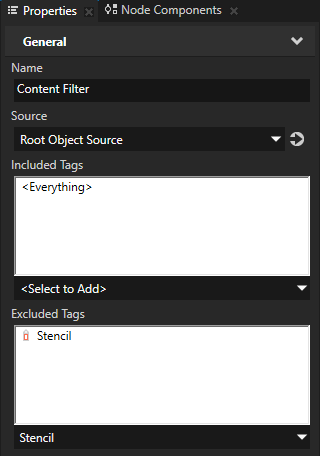
- Repeat the previous step but name the Tag Filter Content Filter and in the Properties set the Excluded Tags to the Stencil tag.
You set the filter to pick the nodes that do not have the Stencil tag.
You use this filter in the next step of this tutorial to collect the ContactsList and Directional Light nodes for rendering.

< INTRODUCTION
NEXT STEP >
See also
To learn more about how you can use filters in your Kanzi application, see Filters.
To learn more about how to use tags in Kanzi Studio, see Using tags.
To learn more about meshes, see Using meshes.
To learn more about the Grid List Box nodes, see Using the Grid List Box nodes.
To learn more about the data sources in Kanzi, see Data sources.

Open topic with navigation